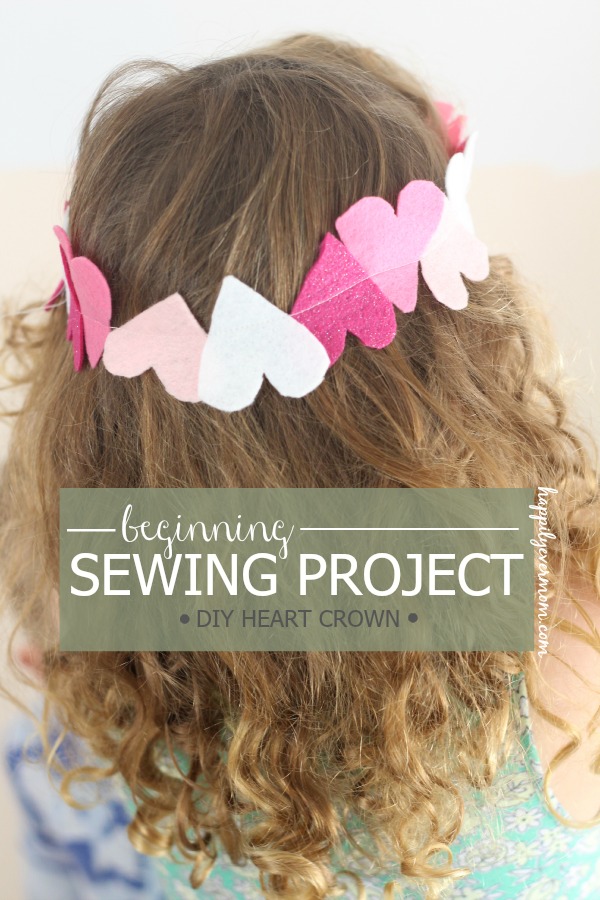
I have wanted to try this beginning sewing project for a while.
If you’re new here to Happily Ever Mom, you may not know that I like to keep my sewing projects nice and simple. In fact, I love a great no-sew project, too. But, my daughter is wild about sewing machines, so I came up with a quick project that she and I could do together.
The bonus? It makes a sweet heart crown that kids will love to wear.
Truth be told, I wanted to sew a garland.
But, my daughter had other plans.
Not surprisingly, her plans involved a crown (my daughter loves dramatic play).
So, we tweaked our adorable garland into a crown that never left my sweet daughter’s head.
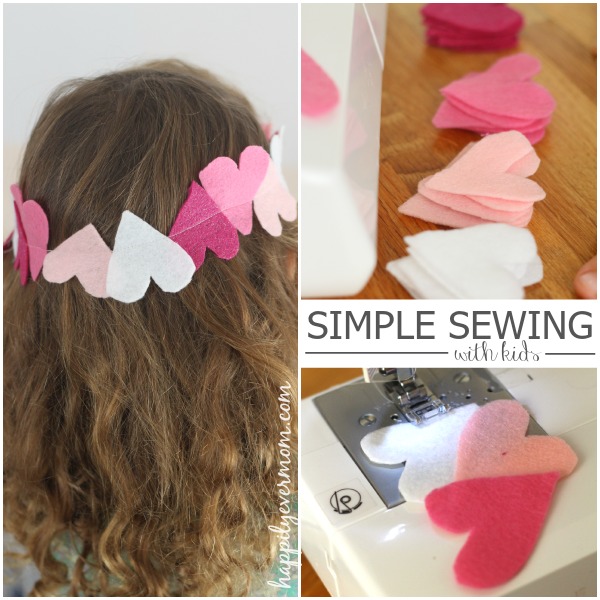
What you need to make this beginning sewing project
- Sewing Machine <—I have this one thanks to my amazing sister-in-law who suggested it. My favorite part? A bar that adjusts the speed of the needle so that my kids can push the pedal without it going super speed! (affiliate link)
- Approx. 4 sheets of felt
- Scissors <—these are the BEST for fabric only. Worth every penny. (aff link)
How to Make a Heart Crown
- Cut out hearts from your felt – we cut out 5 of each color (approximately 20 hearts depending on the size of your child’s head)
- Place your first heart under the foot of your sewing machine.
- Here’s the fun part: the felt hearts will “stick” to each other as you lay them next to each other. This eliminated our need to use sewing pins.
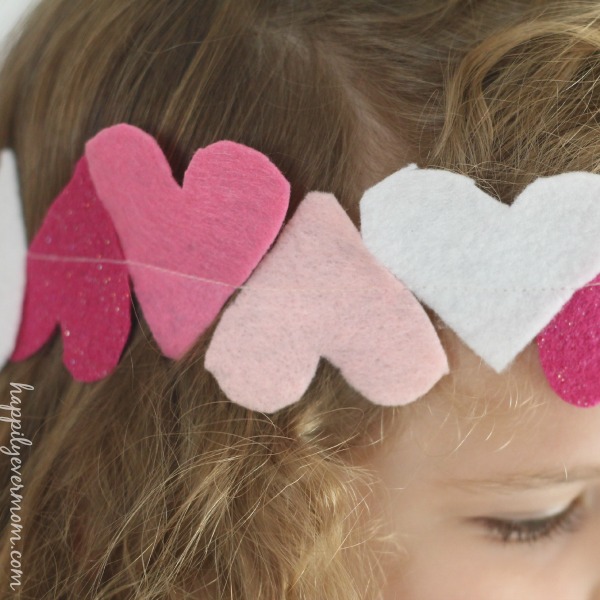
- Place hearts in opposite direction in whatever pattern you choose (we did white, light, dark, glitter)
- Sew the first few hearts in a straight line.
- Add more hearts to your pattern (see picture above of how we laid the hearts on the sewing machine).
- Sew.
- Continue until your line of hearts is long enough to fit around your child’s head.
- Bring the first heart to the foot of the sewing machine (this is how you make the hearts into a circle for the crown).
- Sew and reverse stitch (go backwards over your line). You should have a loop of hearts now.
- Cut any loose thread and wear!
No matter what the crown looks like, kids will love getting to sew something all on their own.
Don’t love hearts?
Try different shapes like fish, circles, or rainbow colors for a unique look.
Follow Katie Joiner | Happily Ever Mom’s board Hobbies :: Sewing on Pinterest.
More Heart Projects from Happily Ever Mom


What a wonderful little project. My 4yo loves to hand sew but I know she’ll feel SUPER special if I set this up for her iwth the machine! THanks for sharing! 🙂
Of course! I’m so glad your little one will love this too!!