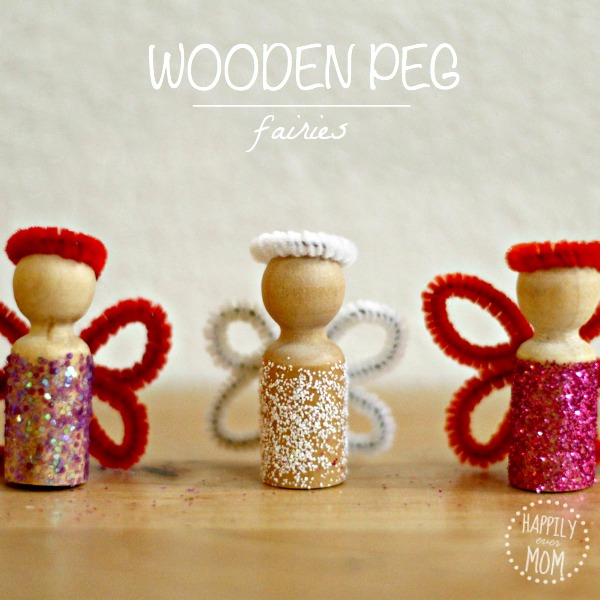
I could just hug our peg fairies.
They are so sweet and simple to make. We paired our fairies with a pumpkin fairy house and it inspired hours of play. The nice thing about this project is that it’s quick to make and quick to dry, so little one’s can start playing right away. I’m just glad I knew what to look for at the store…
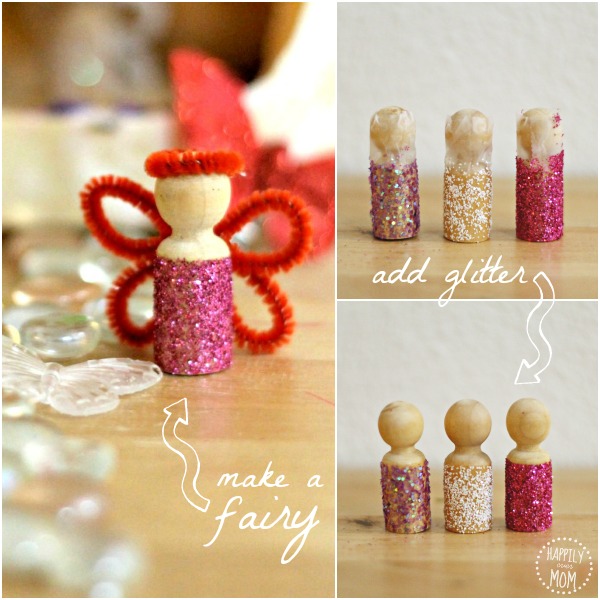
We started off with a three wooden pegs from Michael’s Craft store, but they aren’t called wooden pegs. They’re labeled “game pieces.” Be sure to ask where they are located in the store…hopefully, you won’t wander around looking for an hour like me 🙂
What You Need to Make Peg Fairies:
- 3 Wooden Pegs
- Tape
- Glitter
- Mod Podge or clear adhesive
- Pipe cleaners
- Hot glue gun
How to Make Peg Fairies
We attached scotch tape around the top portion of the wooden pegs. We brushed on modge podge to the bottom half.
Then, the fun part: shaking on the glitter!!
Honestly, you could leave the dolls like this! I’m not much of an artist, but adding some faces or hair would be really sweet. I certainly considered leaving the dolls like this – nice and simple! But, I quickly made some fairy details for my daughter who’s a lover of all things with wings. 🙂
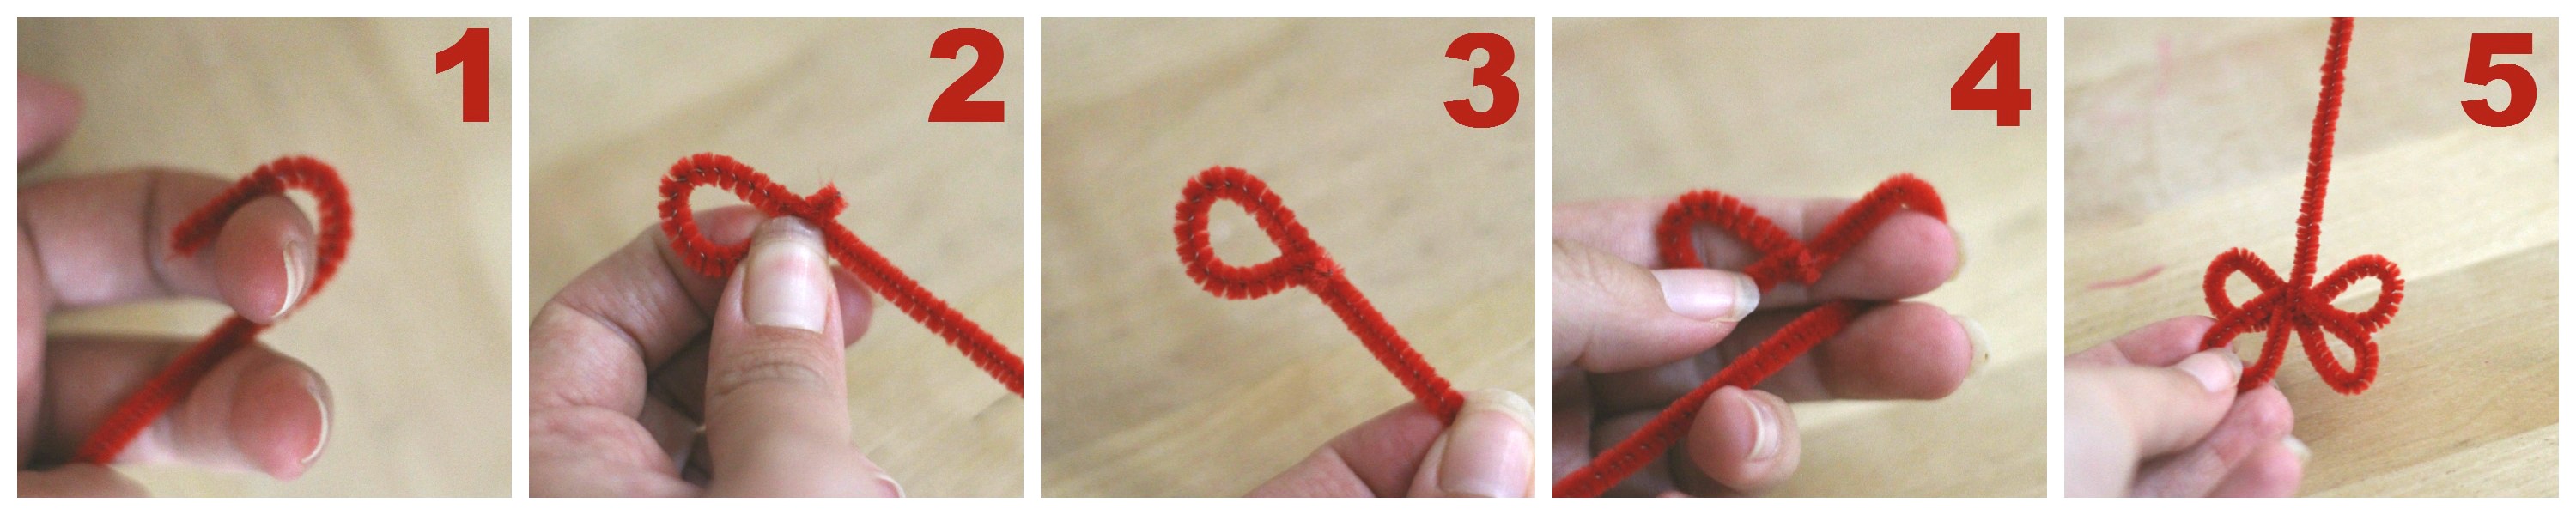
How to Make Peg Fairy Wings
1.) Loop around your finger.
2.) Can you see how a little portion of the loop overlaps? Wrap this little piece around or “tuck” it under the pipe cleaner.
3.) Here’s what it looks like tucked.
4.) Wrap the long piece of pipe cleaner around your finger in the opposite direction – it sort of looks like a bow. Can you see how there are two loops now? Instead of tucking a little piece under, you’ll take the straight portion of the pipe cleaner up and back down in between the two loops. Then, turn the whole piece upside down and repeat the steps 1-4 to make the bottom portion of the wings. <—take a peek at the pics above for help
5.) Cut off the remaining portion of pipe cleaner for the halo or headband on the fairy’s heads. Glue the bands on top.
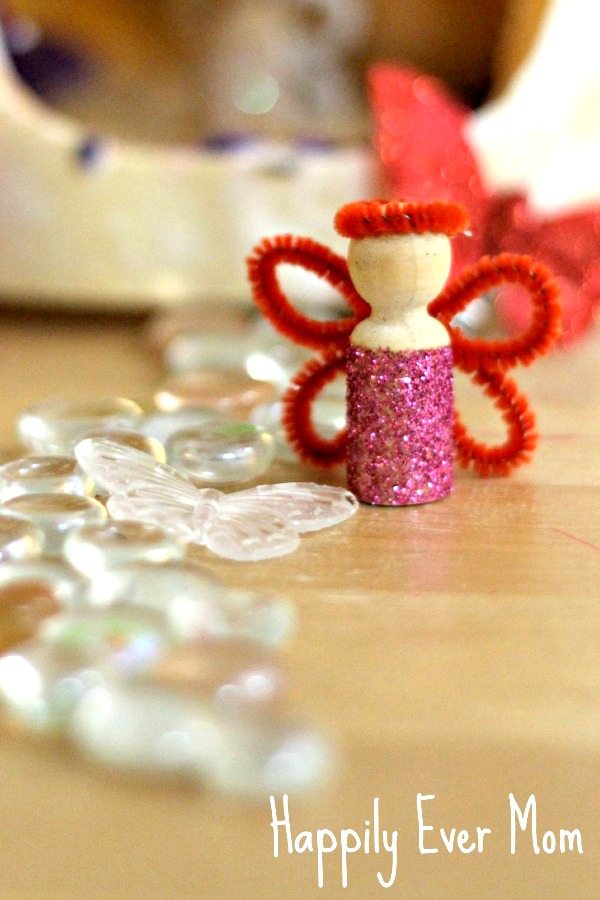
I love how small these are, but they could be a choking hazard for little ones in the house, so be careful.
Although we refer to them as fairies, these could easily be called angels – especially the white one! Add a piece of string and use them as an ornament on your tree this year.
Happy fairy making,

Thanks for stopping by! Keep in touch by following along here: Facebook, Pinterest, Instagram, Twitter, & Google+.
Fun and enjoyable activity that is intriguing for children and not to burdensome for parents.
These are way too cute! Stopping by from Pinning for Play — off to pin this now!!! 🙂
Thanks for stopping by and pinning, Mary Catherine! 🙂
These are so cute! I love the simplicity of them. Thanks for the inspiration!
These are adorable. I could see my girls spending a lot of time playing with them!
Thanks, Shaunna! I’d love to see them if you make your own set 🙂