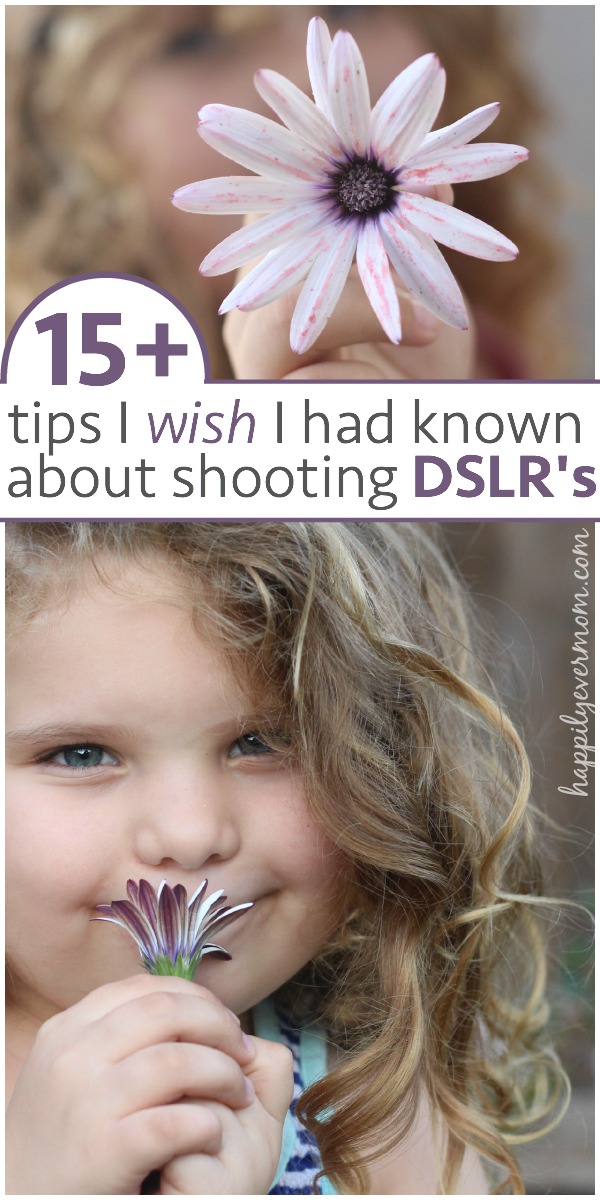
I’ve been thinking about tips for learning to shoot with a DSLR camera.
Since my daughter was born, I’ve learned to take better photos. It’s my favorite stress release and it has helped me to capture and to document my daughter’s childhood (and, now my sons). But, as busy as we are, I realized that it would be really hard to pick up photography as a hobby and skill now, so I came up with this quick list of things I wish I had know about learning to shoot with a DSLR…
Affiliate links provided – see my disclosure policy here 🙂
Before we start, I have to say that investing in a few camera items is a must. All of these items are for Canon – that’s just what I shoot 🙂
- Start with a great camera – I have always been happy with the canon rebel series (this is my current camera and has replaced our video camera too – yay, video options!).
- Grab the Nifty Fifty – Even in program mode, you’ll notice a drastic difference in the artistic quality of your photography. You know those blurry backgrounds, you need a lens like this one to do it!
- An extra memory card – because you’re going to take a lot of photos and running out of space is the worst!
Okay…let’s get started!
1. Learning the Camera Matters
I wanted to pick up my camera and just shoot. That works, but if you really want to unlock the power of your camera and turn your picture taking into an art, you have to learn how your camera works {{shudder}}. I know…I hated it too, but if you learn what all those buttons mean, you’ll thank yourself later…
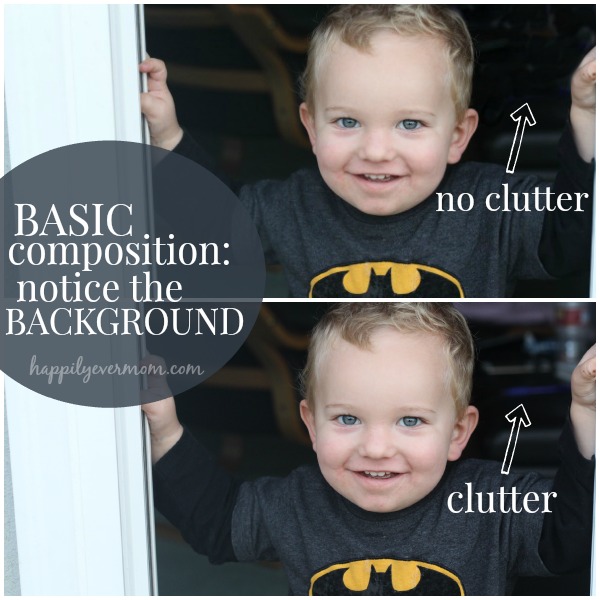
2. Composition is Everything
The way all of the details come together to make a composed photograph is the bread and butter of photography. Noticing the background (like in the picture above), capturing the right light, getting the right angle, nailing your focus – paying attention to and learning all of the details are what will take your photography to the next level. But, there is one detail that matters more than anything…
3. Light
I still argue that composition is king, but if you don’t have a good light source, your photos won’t come out the way you want (just try shooting in a dark closet for example…). From back lighting to split lighting to silhouettes, mastering how to use light comes with time. In the beginning, just notice where light sources are coming from. I started by seeing the light coming through my windows. I noticed how the light pooled on my floors. It taught me that light is directional and changes throughout the day.
4. Shoot Outside First
But, don’t bother practicing between the hours of 10am-2pm unless you’re in complete shade…the sun is just too high to take a great shot without a lot of mastery. Why outside? It’s just the easiest light source to work with and you won’t have to deal with an unexpected, pop up flash ruining your shot (see #10).
5. Learn the Exposure Triangle
If composition and light are what you need to take a great photo, you also need to learn that there are 3 functions of your camera that matter most, too: shutter speed, aperture, and ISO. I’m not going to go in depth here, but I wish I had memorized these three concepts from the beginning. They are the three settings that your camera uses to manipulate light and produce a photo.

6. Rule of Thirds
Rule of thirds is an easy way to remember how to make photos interesting. Instead of shooting your subject directly in the center of your photo, think of your photo as a grid: two vertical lines and two horizontal lines splitting your photo into nine squares (see above). Where these lines intersect is a great place to put your subject for visual interest.
7. Don’t Try So Hard
When I got my camera, I wanted to take photos like everyone else. I drooled over photos on Pinterest, but the truth is, that’s someone else’s art. Be inspired by it, but don’t try to replicate it (right away). You’ll lose the joy that you can experience from taking great photos (see #11) – for now, let the professionals be the professionals, and recognize that those photos that you see on Pinterest are from people who have been shooting for decades – just like any other art form, photography takes time to learn.
8. Weather Matters
So, if I’m going to suggest going outside to take photos, I should warn you that weather matters. Why? It directly effects your light source and light is the detail that matters most, right? (remember #3). Clouds, haze, rain, direct sun, shade, all of those effect your light. If you really want to practice, get outside on a nice sunny day before 10am or after 4pm. The light will behave nicely for you during those hours!
9. You Can’t Get Back Focus
If your focus is off (or soft, meaning it’s blurry), there’s no editing software or filter that can help you. Know how to focus your camera and learn to move the toggle. <— fancy word for red dot that you see when you put your eye up to the camera and push the camera shutter down halfway. Learn how to focus properly early on!
10. Step Away From the Pop Up Flash
That flash that pops up with you take a photo…well, that gives away that you’re not exactly sure how to use your camera. But that’s okay…you’re learning. Just know that you will almost NEVER get a great shot with a pop up flash (notice I said great…). The light is really harsh and it’s easy to get unwanted reflections in people’s eyes. If you have to shoot inside after the sun has gone down, try using a diffuser to soften the pop up light (affiliate link).
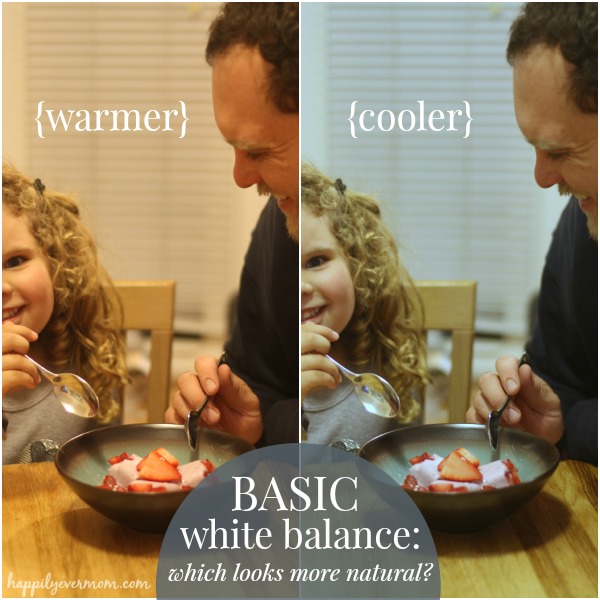
11. White Balance – You’ll get it down the road
White balance is what makes the color in an image cooler or warmer (in very basic terms). It can make an image look like an improper exposure when it’s the white balance that’s messing with your image. What do you think of the image above? Which do you think looks like more natural light? The one on the right is more true to what natural light would look like instead of the orangish tones on the left.
12. It’s Not Just the Camera…
Here’s the thing…DSLR cameras are great, but it’s the person behind the camera that matters. A camera can’t move itself to stand at just the right angle. A camera can’t push it’s own button. You’re the one in control. Don’t forget that!
13. Black and White Doesn’t Make Photos Look Better or More Professional
In fact, nailing a black and white photo takes incredible expertise! Although I think it’s really fun to play with filter settings, changing your settings to black and white doesn’t “make a photo better.” In fact, it can make a picture really flat. A great black and white needs deep shadows and perfect highlights to really pull it off – it’s okay to shoot in color and love it (for now!).
14. Bring on the FUN
There was a time when I let all the rules of photography take away from the joy of taking photos of my kids. I now realize that taking photos of my kids is enough (if you want to go profressional, do it!), but I didn’t want to…for now anyway. I wanted my camera to bring peace, joy, and excitement to my day while I’m home with my kids. When I’m most stressed, I take the kids in the backyard, get them laughing or play chase, and just shoot. It’s the best therapy on the planet.
15. Keep Trying!
When in doubt, just keep shooting…
You’ll get better everyday.
Want More Posts?
Check out these tips for taking better photos of baby.

And, follow our photography board on Pinterest
Follow Katie Joiner | Happily Ever Mom’s board Hobbies :: Photography on Pinterest.
Great tips!! and I LOVE the photo of L!! What a beauty!
Thanks, Lisette!! You’re too sweet 🙂
I really love your site! The tips are so helpful and not overly complicated. Thanks!
Thanks so much, Ashley! I’m so glad you’re here 🙂